If you don’t see the API Keys tab, open a project first. Org Settings has no API Keys tab.
Set up with an AI agent
Paste this into Cursor, Claude Code, or another assistant after you have created a key in the UI:Wire a TestDino API key into Playwright and CI as TESTDINO_TOKEN.
Create an API key
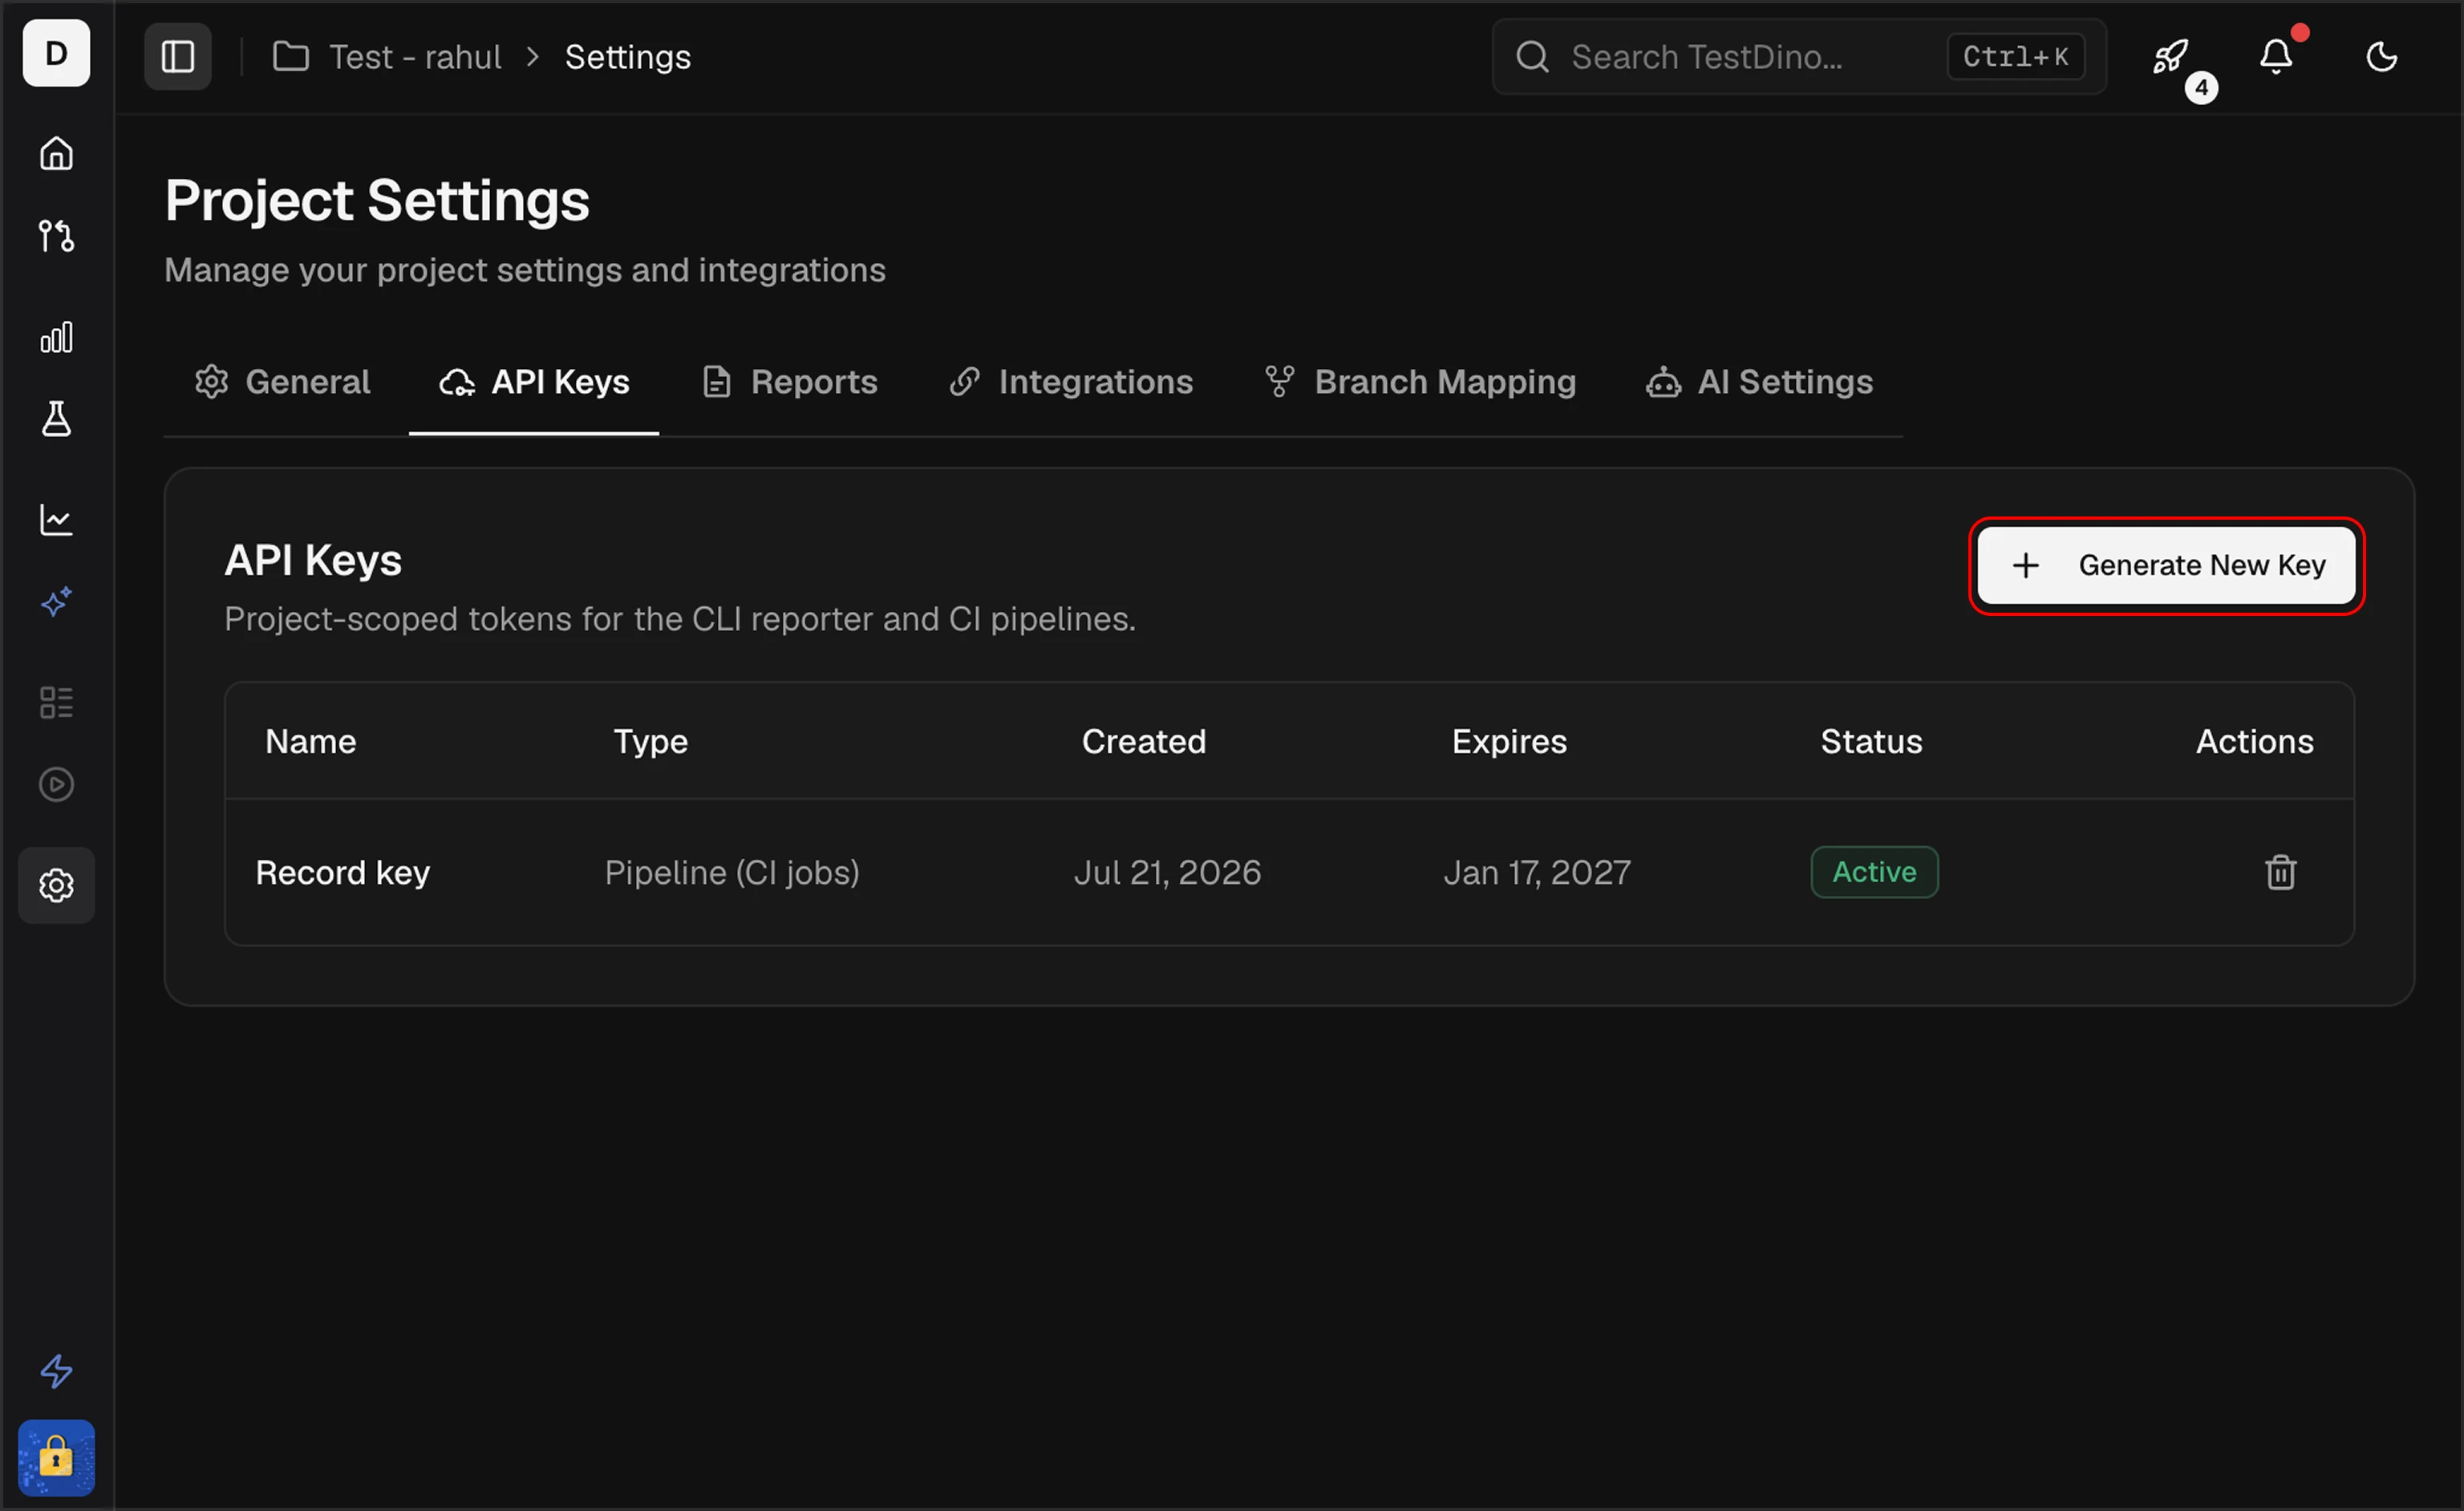
- Open your project in TestDino
- Go to Project Settings → API Keys
- In Keys & Tokens, click + New → API Key
- Enter a Key Name, pick a Type (Ingestion for local or CI uploads, Pipeline for Azure DevOps and TeamCity plugins), and choose an Expiration of 30, 60, 90, or 180 days
- Click Create API Key
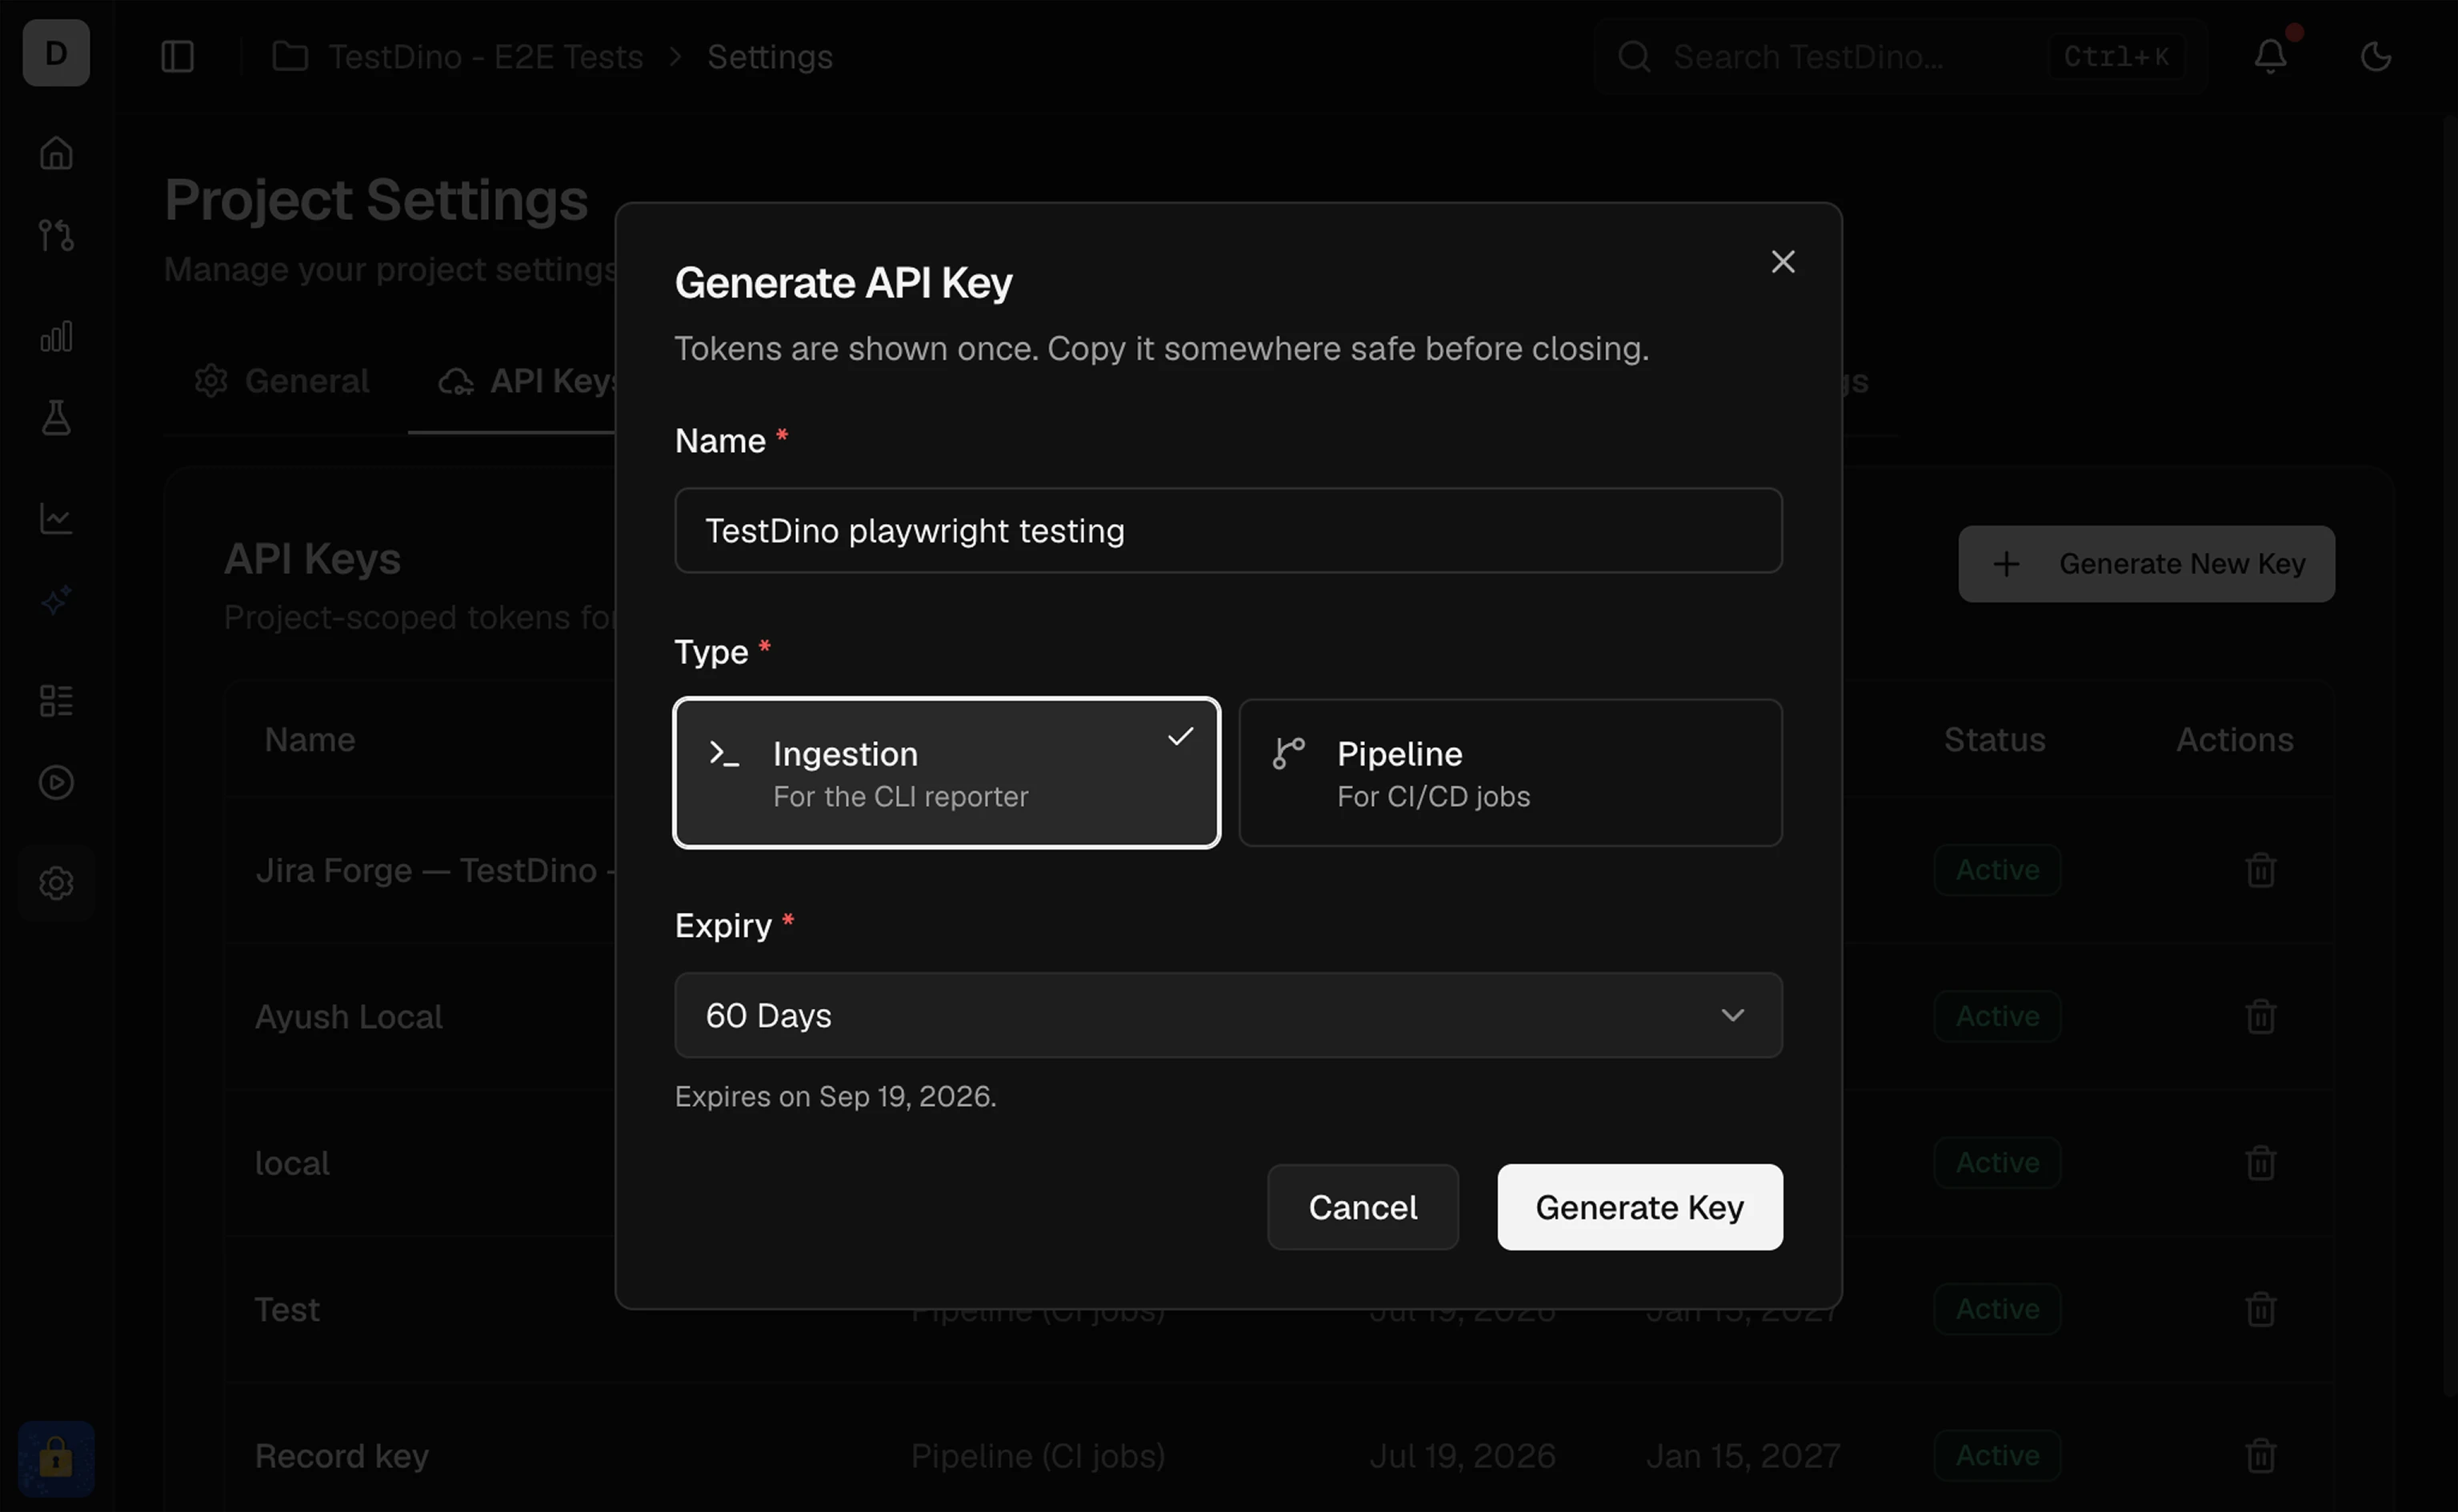 The key is shown once. Copy it and store it as
 TESTDINO_TOKEN.
Use the key
SetTESTDINO_TOKEN, then run your tests. Results stream during the run:
playwright.config.ts
Store the key in CI
Never hardcode API keys in workflow files. Store them as secrets and exposeTESTDINO_TOKEN to the test step. Full pipeline configs are in CI Setup.
- GitHub Actions
- GitLab CI
- Jenkins
- Azure DevOps
- CircleCI
- Go to your repository → Settings → Secrets and variables → Actions
- Click New repository secret
- Name it
TESTDINO_TOKEN - Paste your API key
- Click Add secret
Create a Personal Access Token
Use a PAT for the Public API and MCP. It is a user credential that reaches the organizations and projects you select at creation.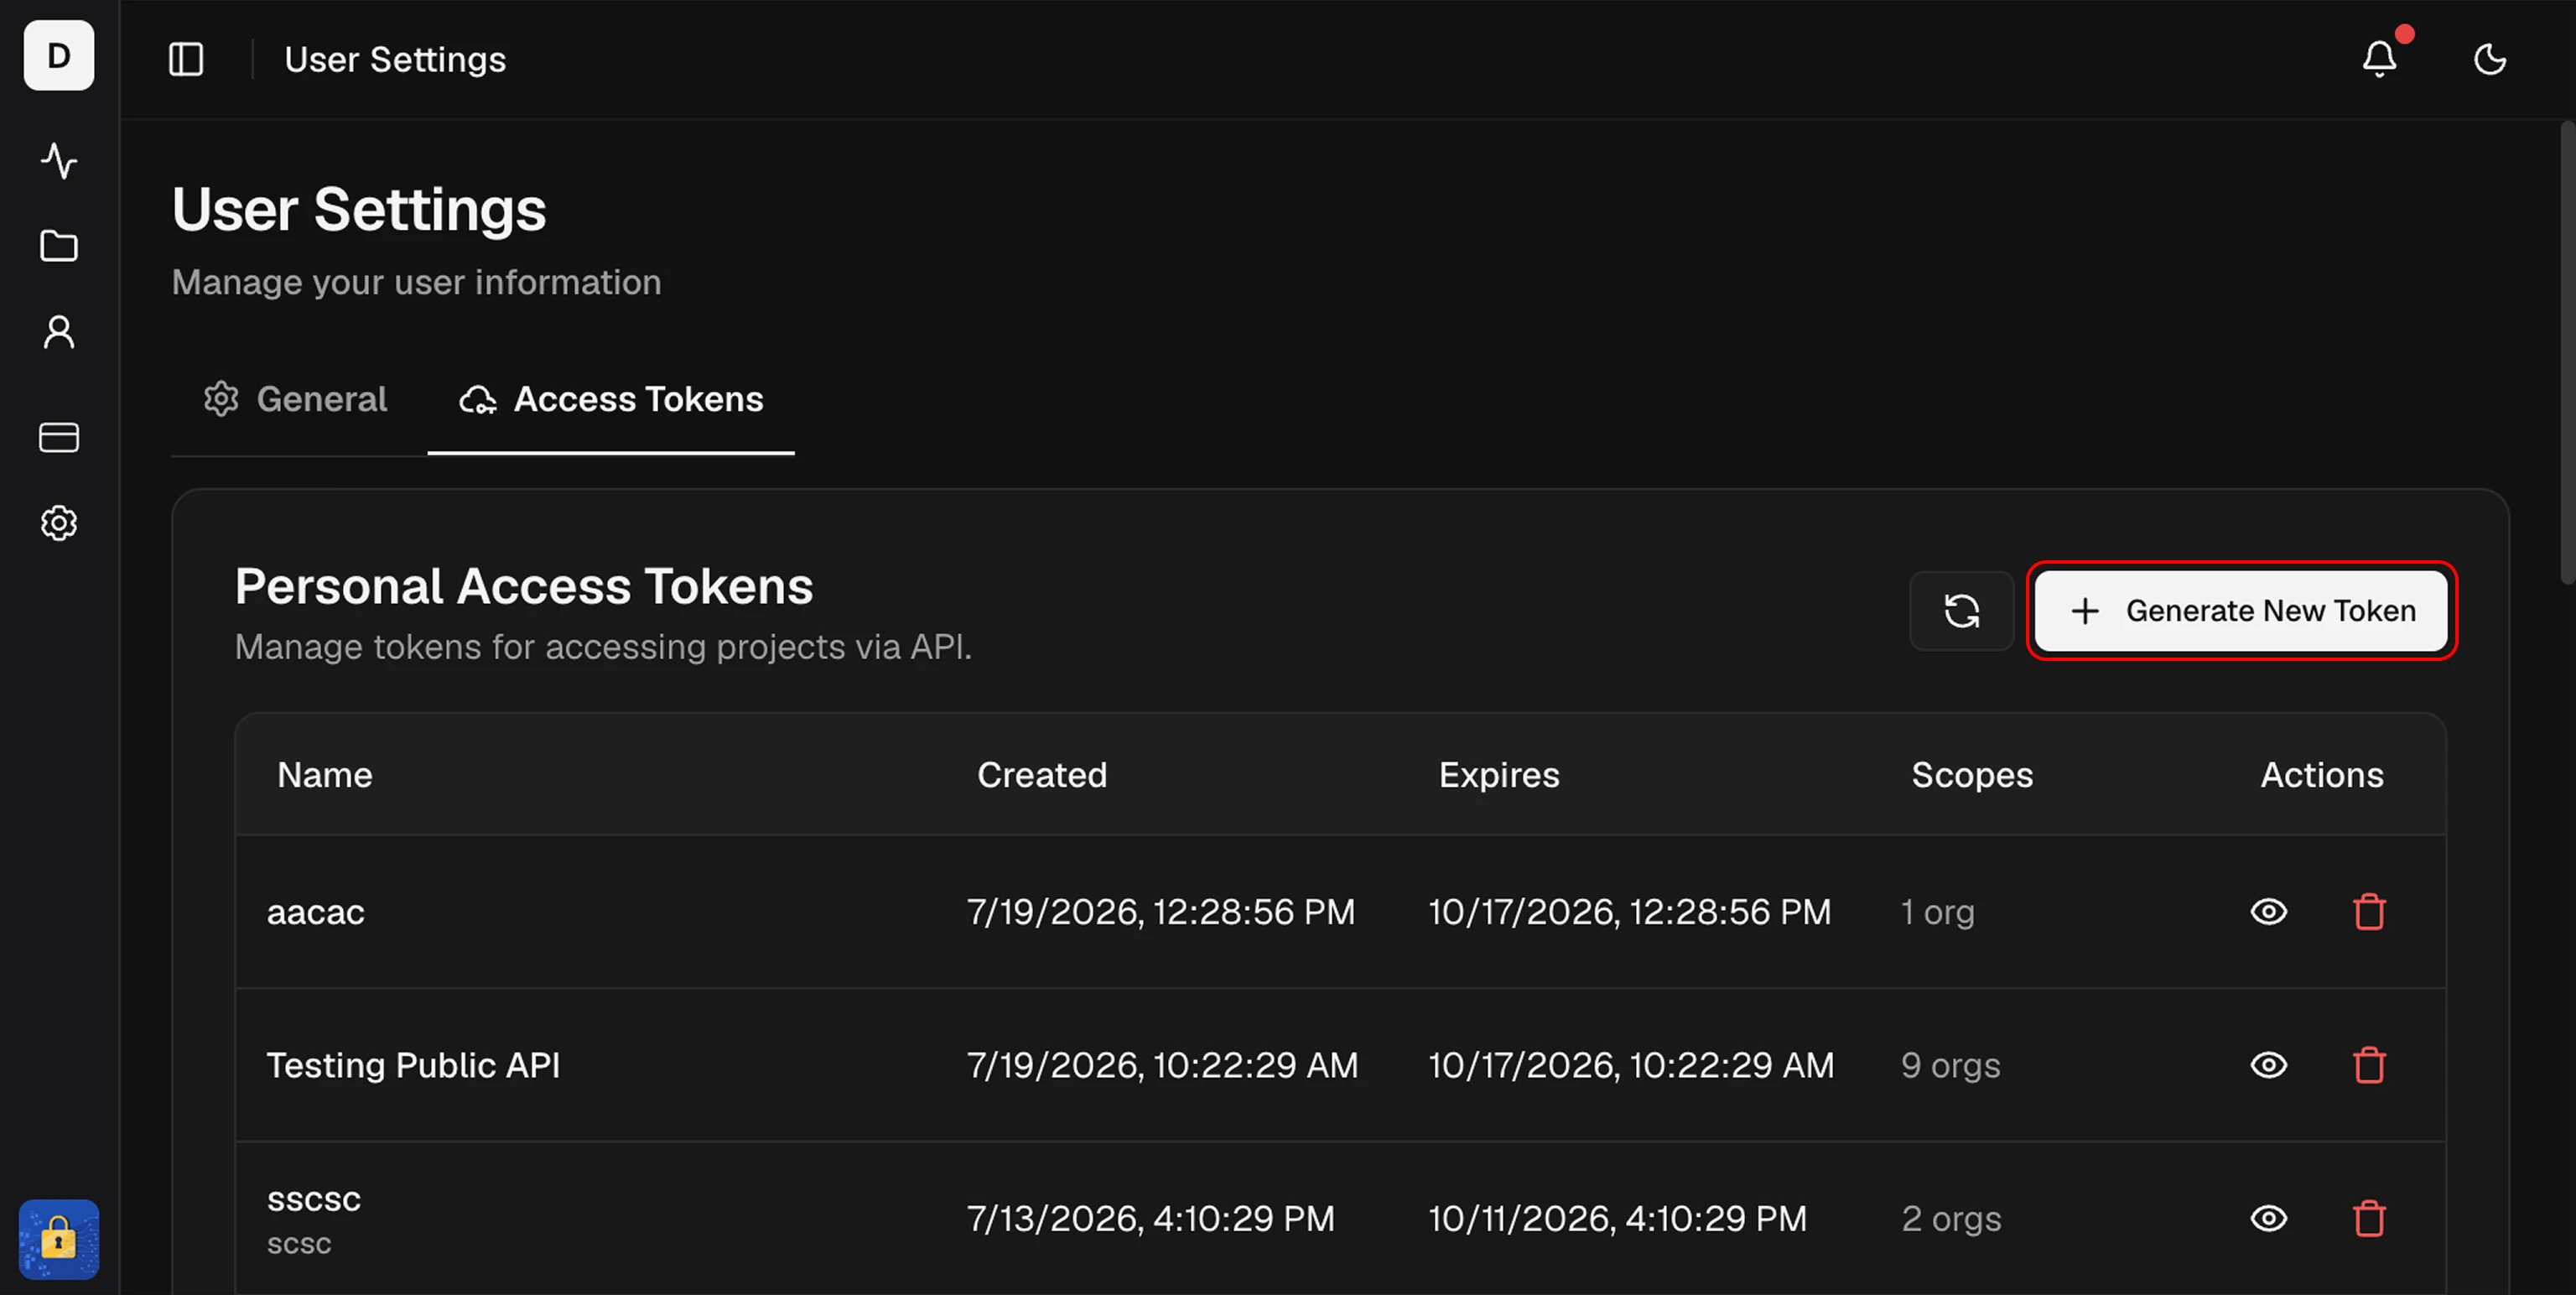
- Open your profile → User Settings → Personal Access Tokens
- Click Generate new token
- Enter a Token Name, select organizations and projects, choose an Expiration, and create it
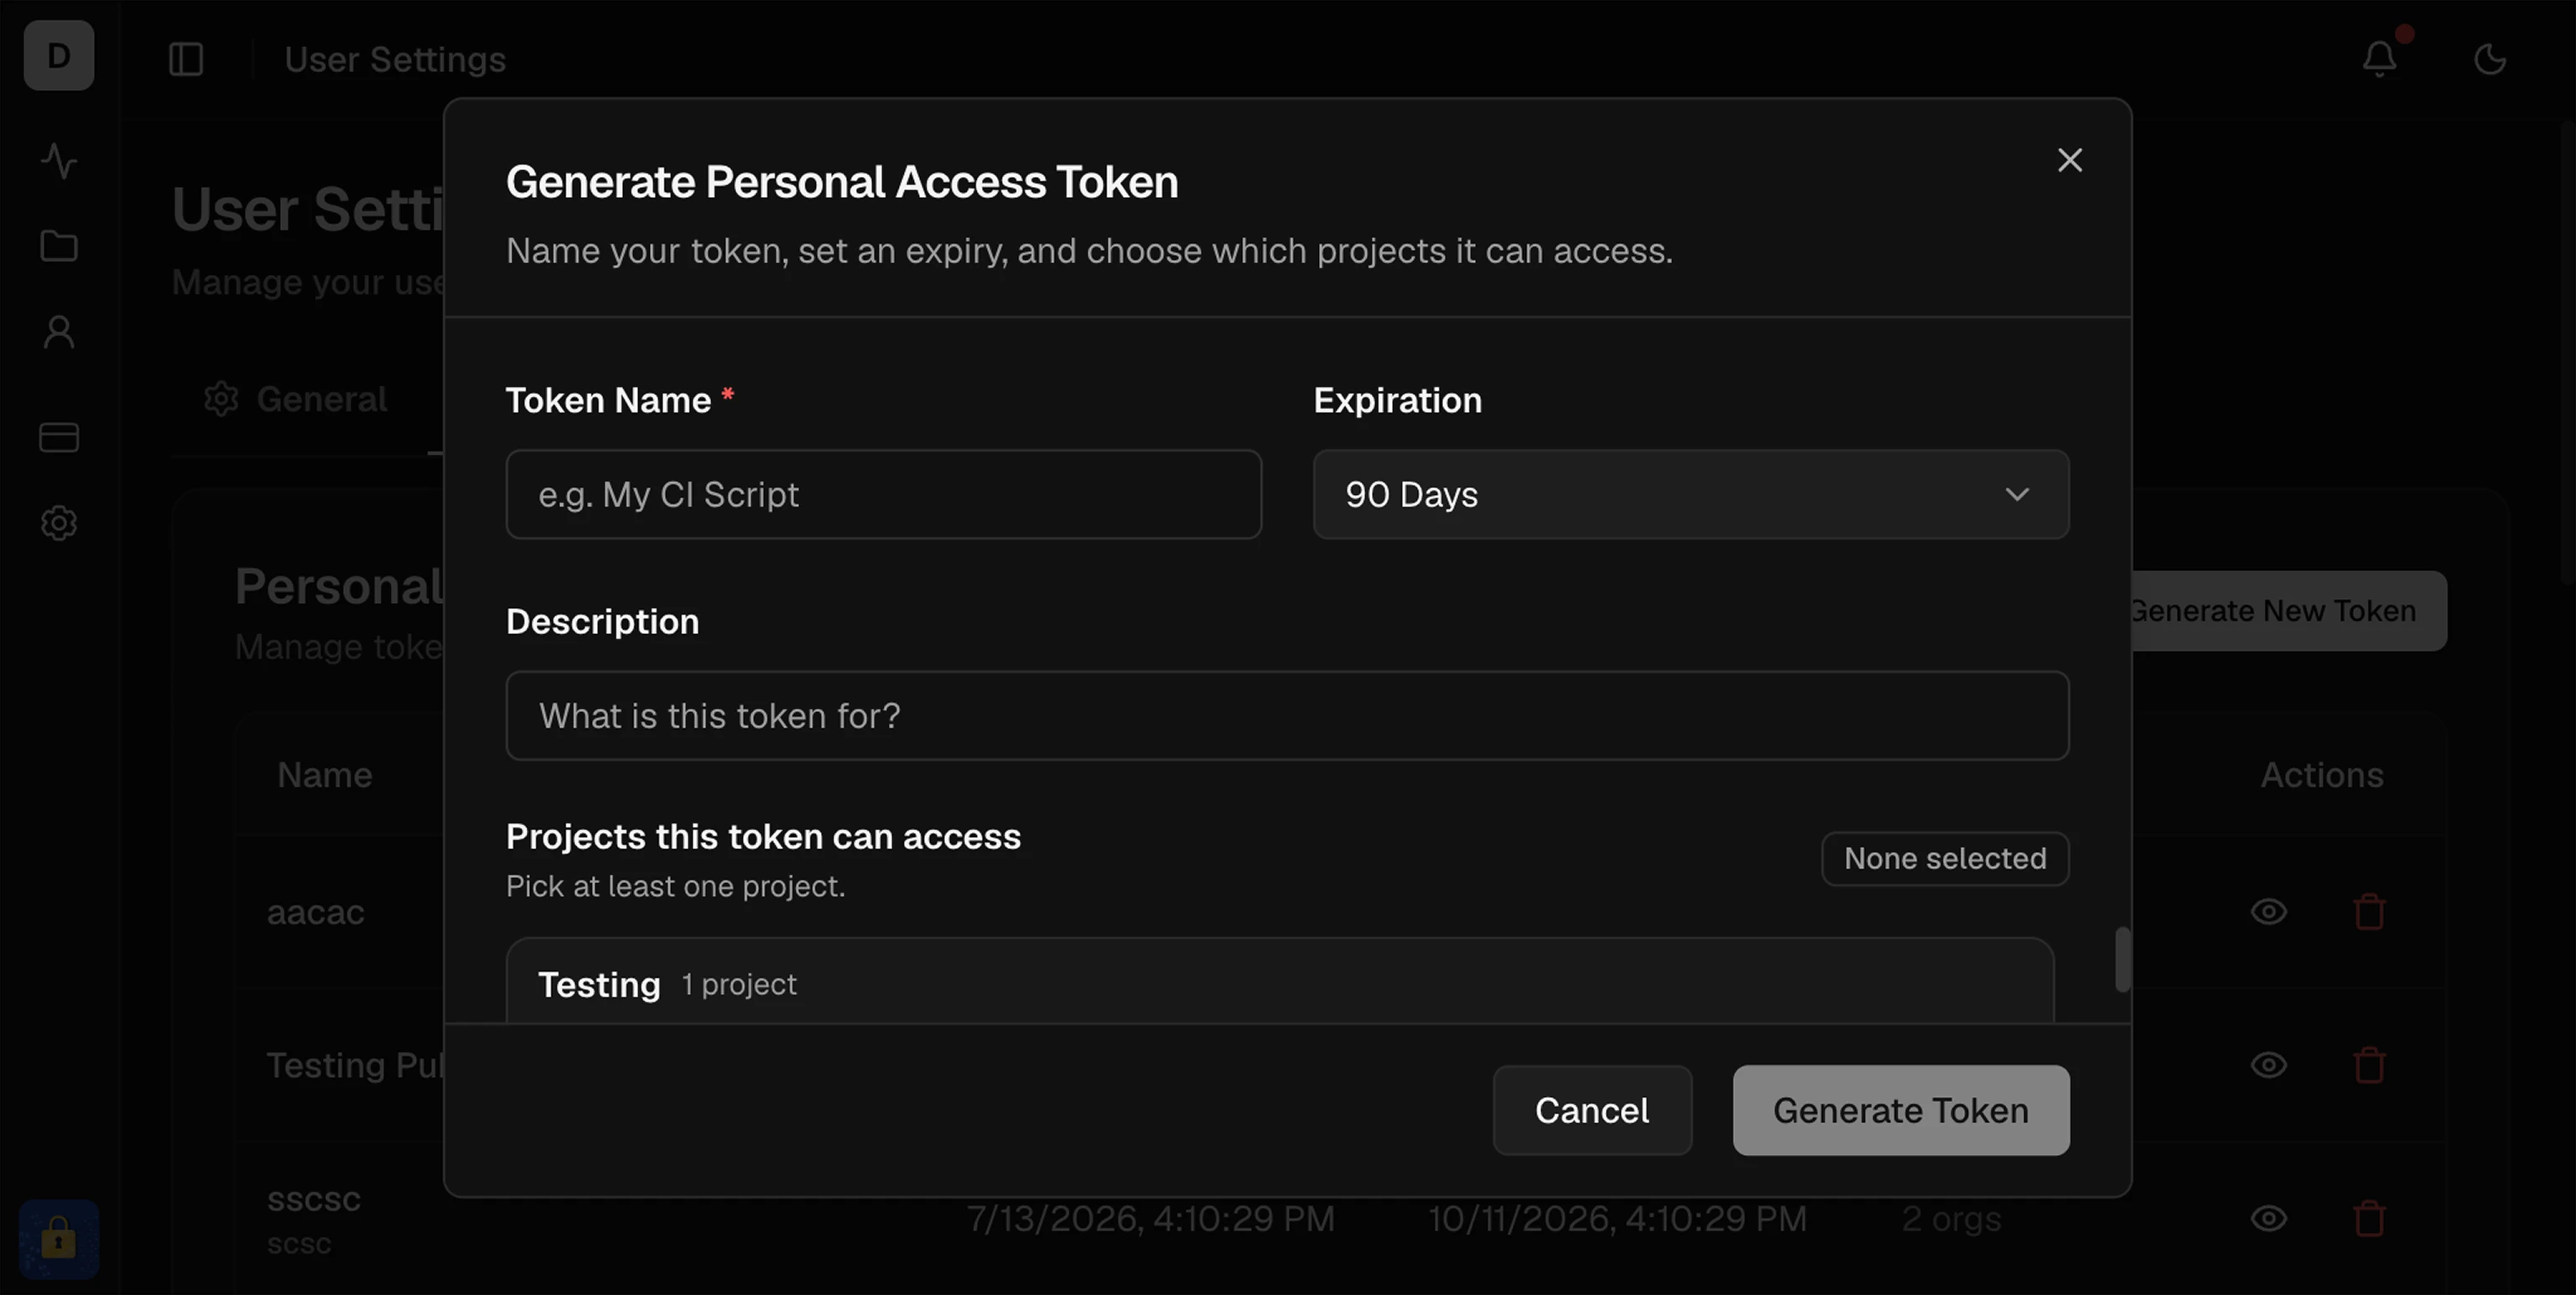 The
The td_pat_ token is shown once. Use it as Authorization: Bearer td_pat_....
Prefer short expirations for CI. Use separate keys per pipeline or environment. Never commit keys to version control. When a key expires or is exposed, create a new key, update your secret, then delete the old one.
Node.js CLI
Install @testdino/playwright and stream your first run
CI Setup
Stream results in GitHub, GitLab, Azure DevOps, and more
Public API
Use a PAT to query test data over the API
Project Settings
All project configuration