

Quick Reference
2 hosts to keep straight
TestDino serves its dashboard and its API on different hostnames, and the split matters for SSO:
On a dedicated or custom domain, replace
user.testdino.com with the host your TestDino account team gave you.
Before you start
- An Owner or Admin account. Only Owners and Admins see the Single Sign-On tab.
- SSO enabled on your plan. The tab appears only for SSO-entitled organizations, so contact support@testdino.com if it is missing.
- IdP admin access to create an app integration.
- DNS access for each domain you enforce, to publish a verification record.
- An organization key you pick in TestDino, such as
acme.
Pick your SSO mode
Enforcement decides who signs in through your IdP and what happens to accounts that already exist. Choose the mode before you configure anything, because it changes how existing members are handled.
Enforcing SSO is the mode most companies want. There is no bulk migration step: each existing member links their account by signing in through the IdP once.
Guests and external users
SSO provisions only people whose email is on a domain you have verified. A guest signing in with an outside address, such as a partner’s domain or a personal account, cannot be provisioned through SSO. To give an external person access, either verify the domain their email uses, or invite them into your organization by email so they use a standard login. Learn more about inviting members in Users, Roles & Permissions.How it fits together
SSO coordinates 2 systems that must agree on the same URLs:- Your IdP: the OIDC app and who may use it.
- TestDino (Settings → Single Sign-On): the IdP address, signing material, and policy.
acme). Pick it first and use the exact same value on both sides. TestDino builds every URL from it.
Configure SSO
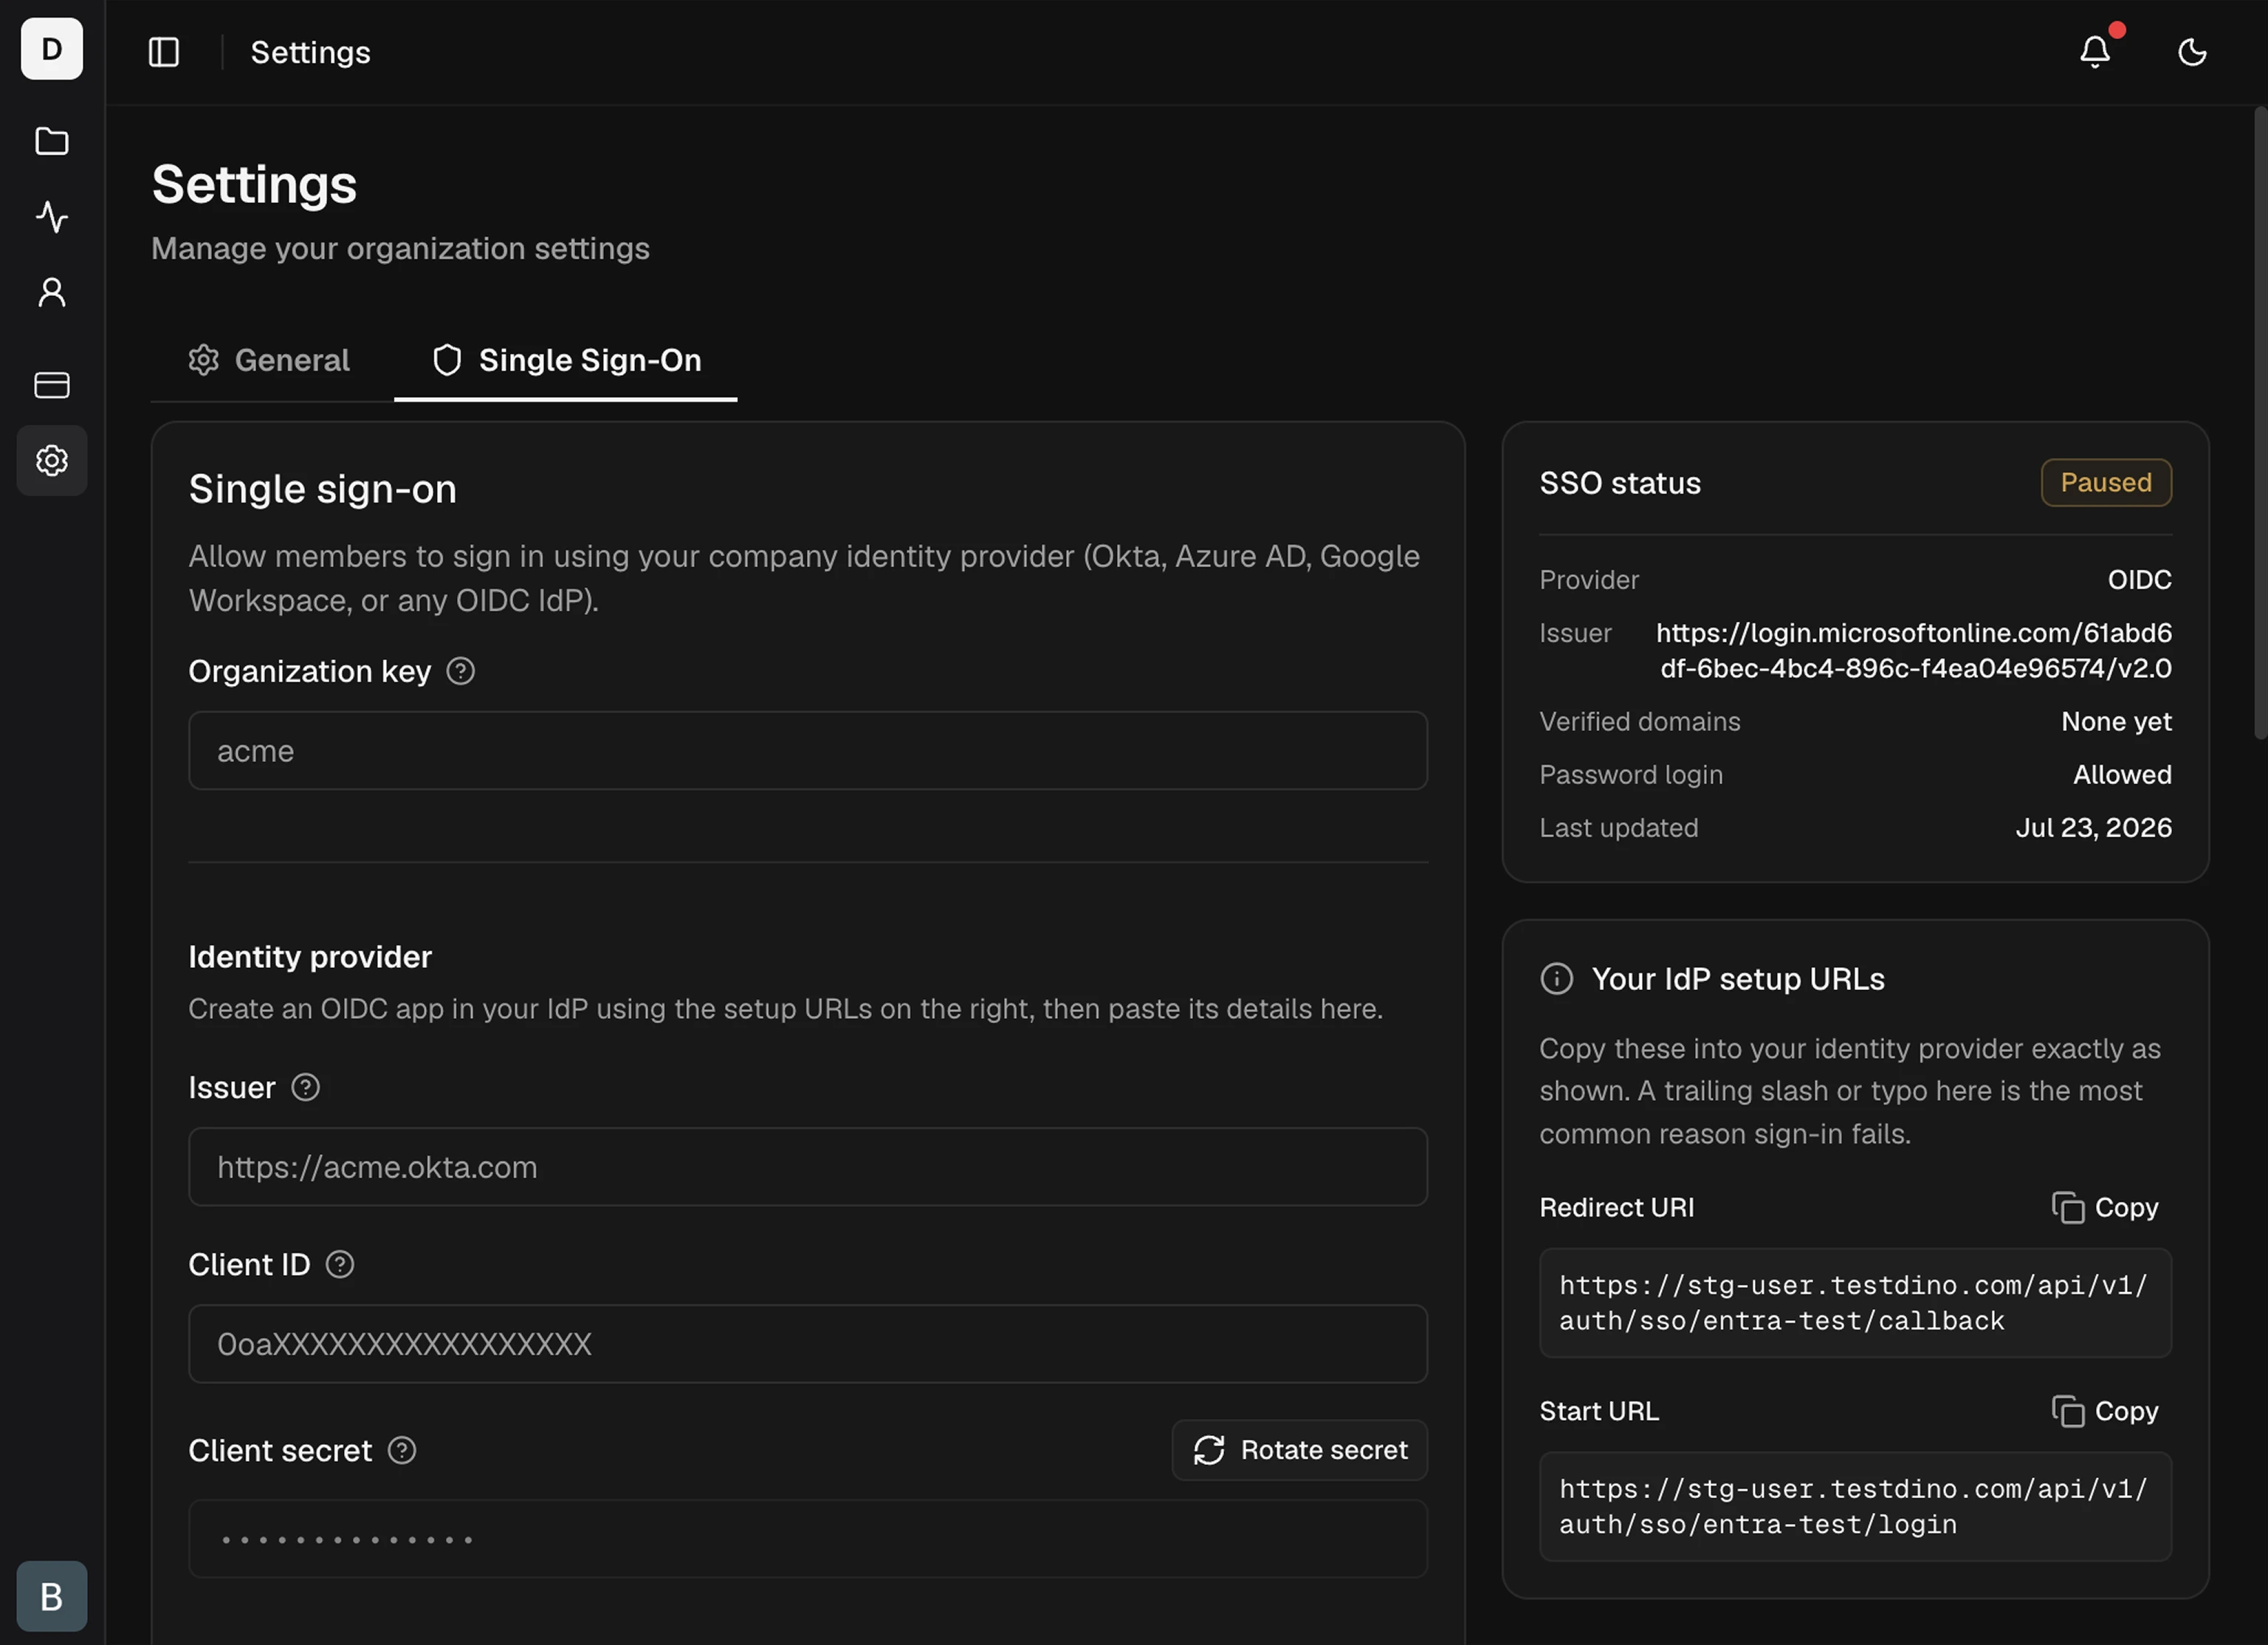
1
Open the SSO settings
Go to Settings → Single Sign-On. No tab means you are not an admin, or the organization is not SSO-entitled.
2
Pick an organization key
Enter your organization key before you set up the IdP. It becomes part of every sign-in URL, so changing it later breaks existing links. Use lowercase letters, digits, and hyphens, such as
acme.3
Create an OIDC app in your IdP
Create an OIDC web app with the Authorization Code grant type. When it asks for a sign-in redirect URI, use this exact value:Then find the Issuer, Client ID, and Client secret for the next step. Each provider names these fields differently:
- Okta
- Azure Entra ID
 Okta
Okta Azure Entra ID
- Go to Applications → Create App Integration → OIDC / Web Application and paste the redirect URI above.
- Open Assignments, assign your users, and save.
If Okta returns “Policy evaluation failed”, add an access policy at Security → API → Authorization Servers → default → Access Policies, then add a rule that allows the Authorization Code grant for your assigned users.
4
Paste the values into TestDino
In the Single Sign-On card, paste the Issuer, Client ID, and Client secret, then save. The secret is encrypted at rest and never shown again.
5
Set enforcement and a default role
- Require SSO for these domains blocks password sign-in for any email on a verified domain and sends those users to your IdP. Enforcement applies only to verified domains (see below).
- Default role is the role assigned on a user’s first SSO sign-in. Member is typical, and Admins can change it later. A new SSO user can receive
admin,member,billing, orviewer, neverowner.
A brand-new user signs in with no extra setup. Someone who already has a TestDino account (password or Google) links to SSO only when enforcement is on for their verified domain, otherwise sign-in returns “An account with this email already exists”.
Verify your domain
Adding a domain does not enforce SSO on its own. TestDino confirms you own the domain with a DNS TXT record before it routes or enforces that domain. This prevents another organization from claiming a domain you own.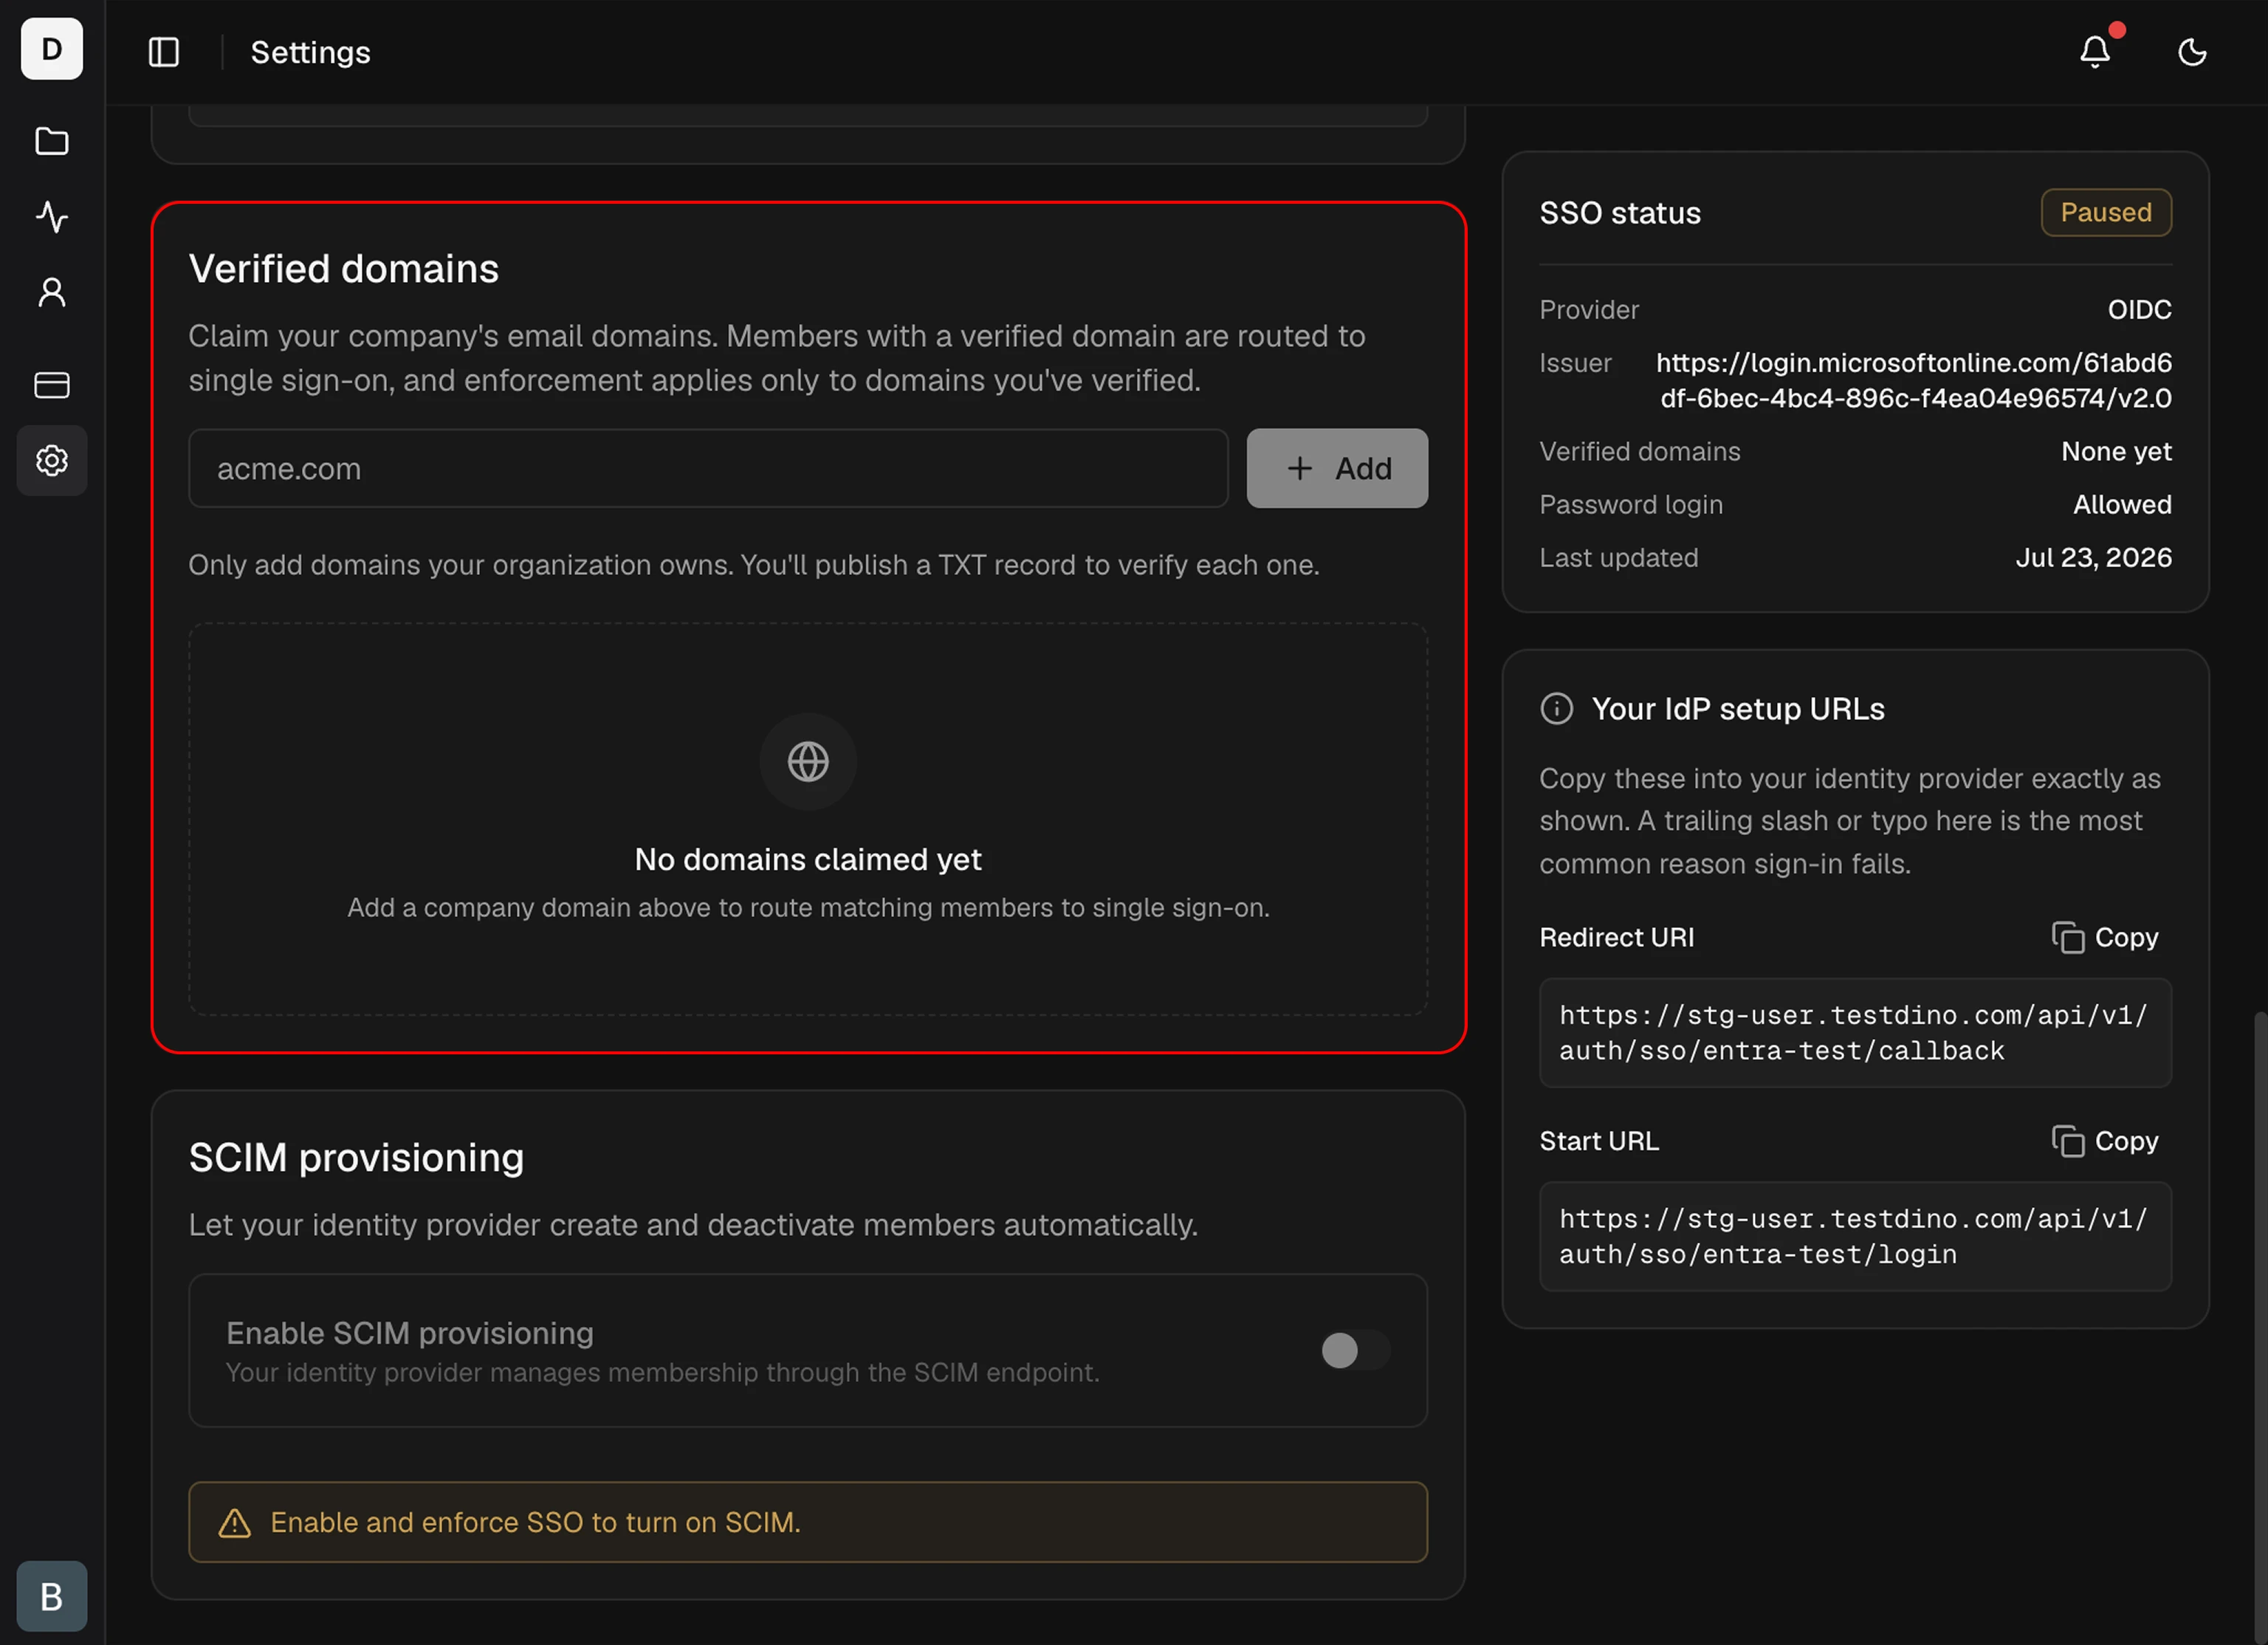
1
Add the domain
In the Single Sign-On card, add a domain such as
acme.com. It starts in the Pending state and shows a TXT record to publish. Verification is exact-match: verifying acme.com covers @acme.com emails only. Add subdomains separately.2
Publish the DNS TXT record
Copy the record from the domain row and add it at your DNS provider:
TestDino generates the token, so copy it from the row rather than typing it.
3
Verify
After DNS propagates, click Verify on the domain row. On success, the domain moves to Verified and starts powering discovery and enforcement. If it still fails, DNS may not have propagated yet, so wait and retry.
Public email domains such as
gmail.com cannot be verified or enforced. Only domains your organization controls in DNS are eligible. A domain can be verified by 1 organization at a time, so if another organization already verified it, verification returns a conflict.Domain states
TestDino re-checks each verified domain’s DNS record about every 24 hours. If the record goes missing, the domain enters a 7-day grace window before it stops working, so a brief DNS slip never locks your team out mid-day. TestDino emails admins when a domain enters grace and again before it is revoked.Save and test
Click Save changes. The status badge shows Configured · OIDC. Test in an incognito window: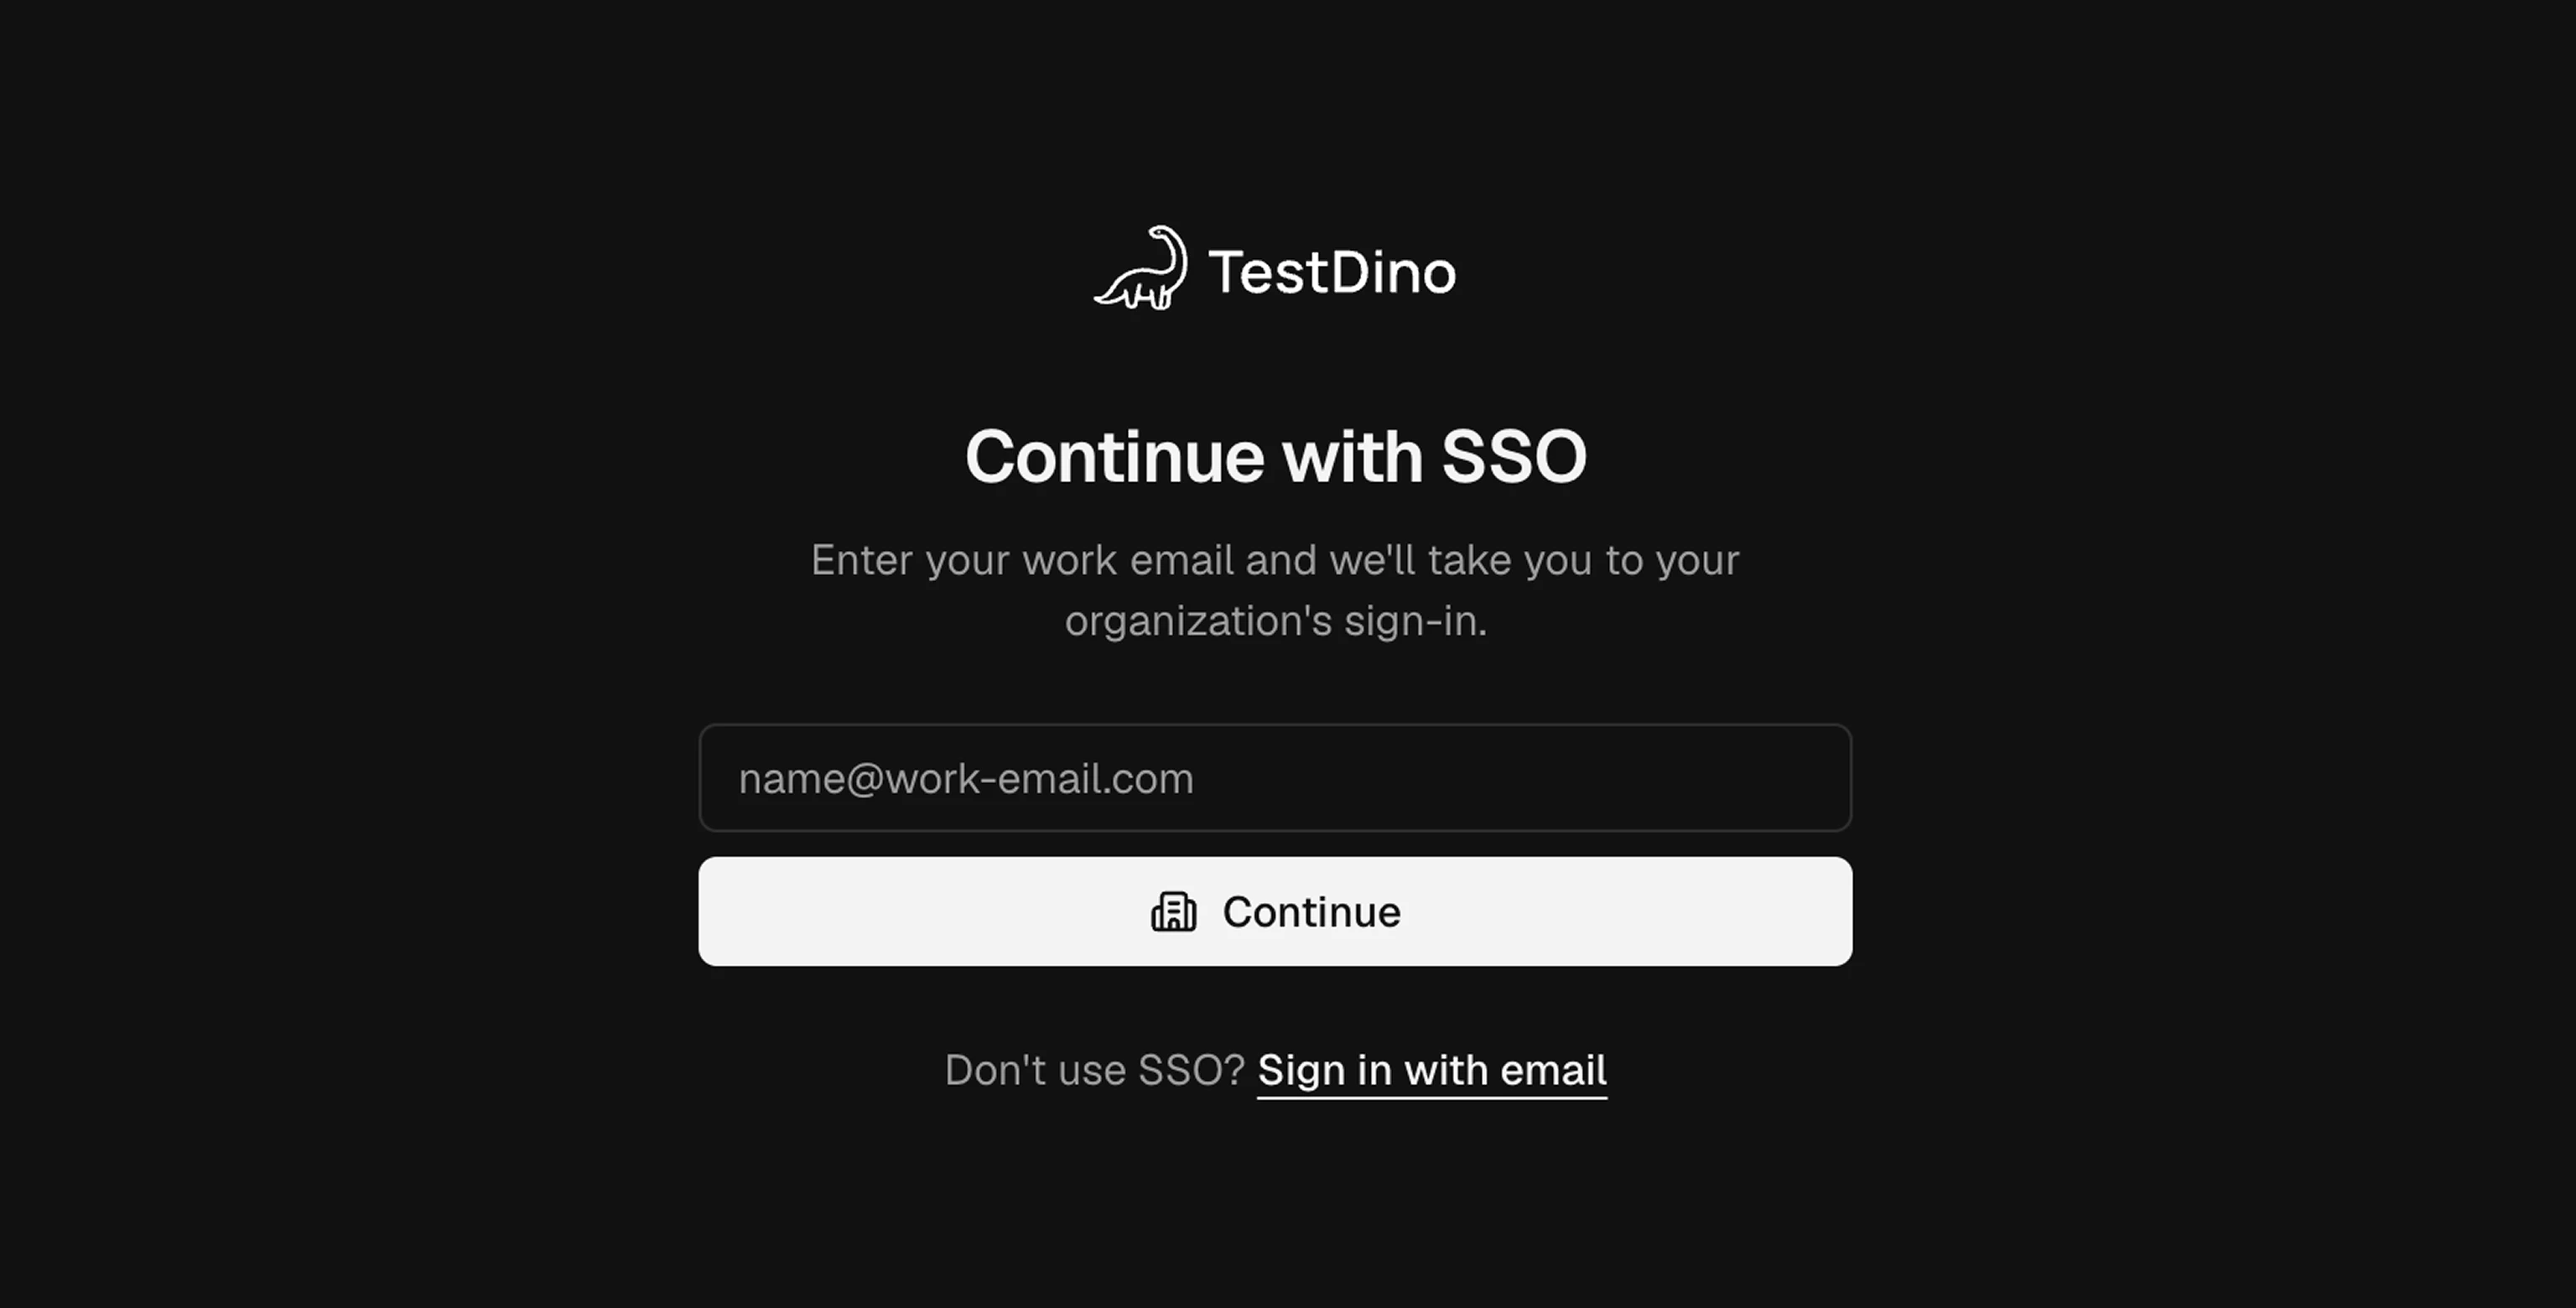
1
Start the sign-in
Open
https://app.testdino.com/auth/sso, enter a work email on a verified, SSO-enabled domain, and click Continue. The direct link https://user.testdino.com/api/v1/auth/sso/<your-org-key>/login also works and skips email discovery.2
Sign in at your IdP
Complete the login with your IdP credentials.
3
Confirm the result
You return signed in, and the user appears in your organization.
How your team signs in
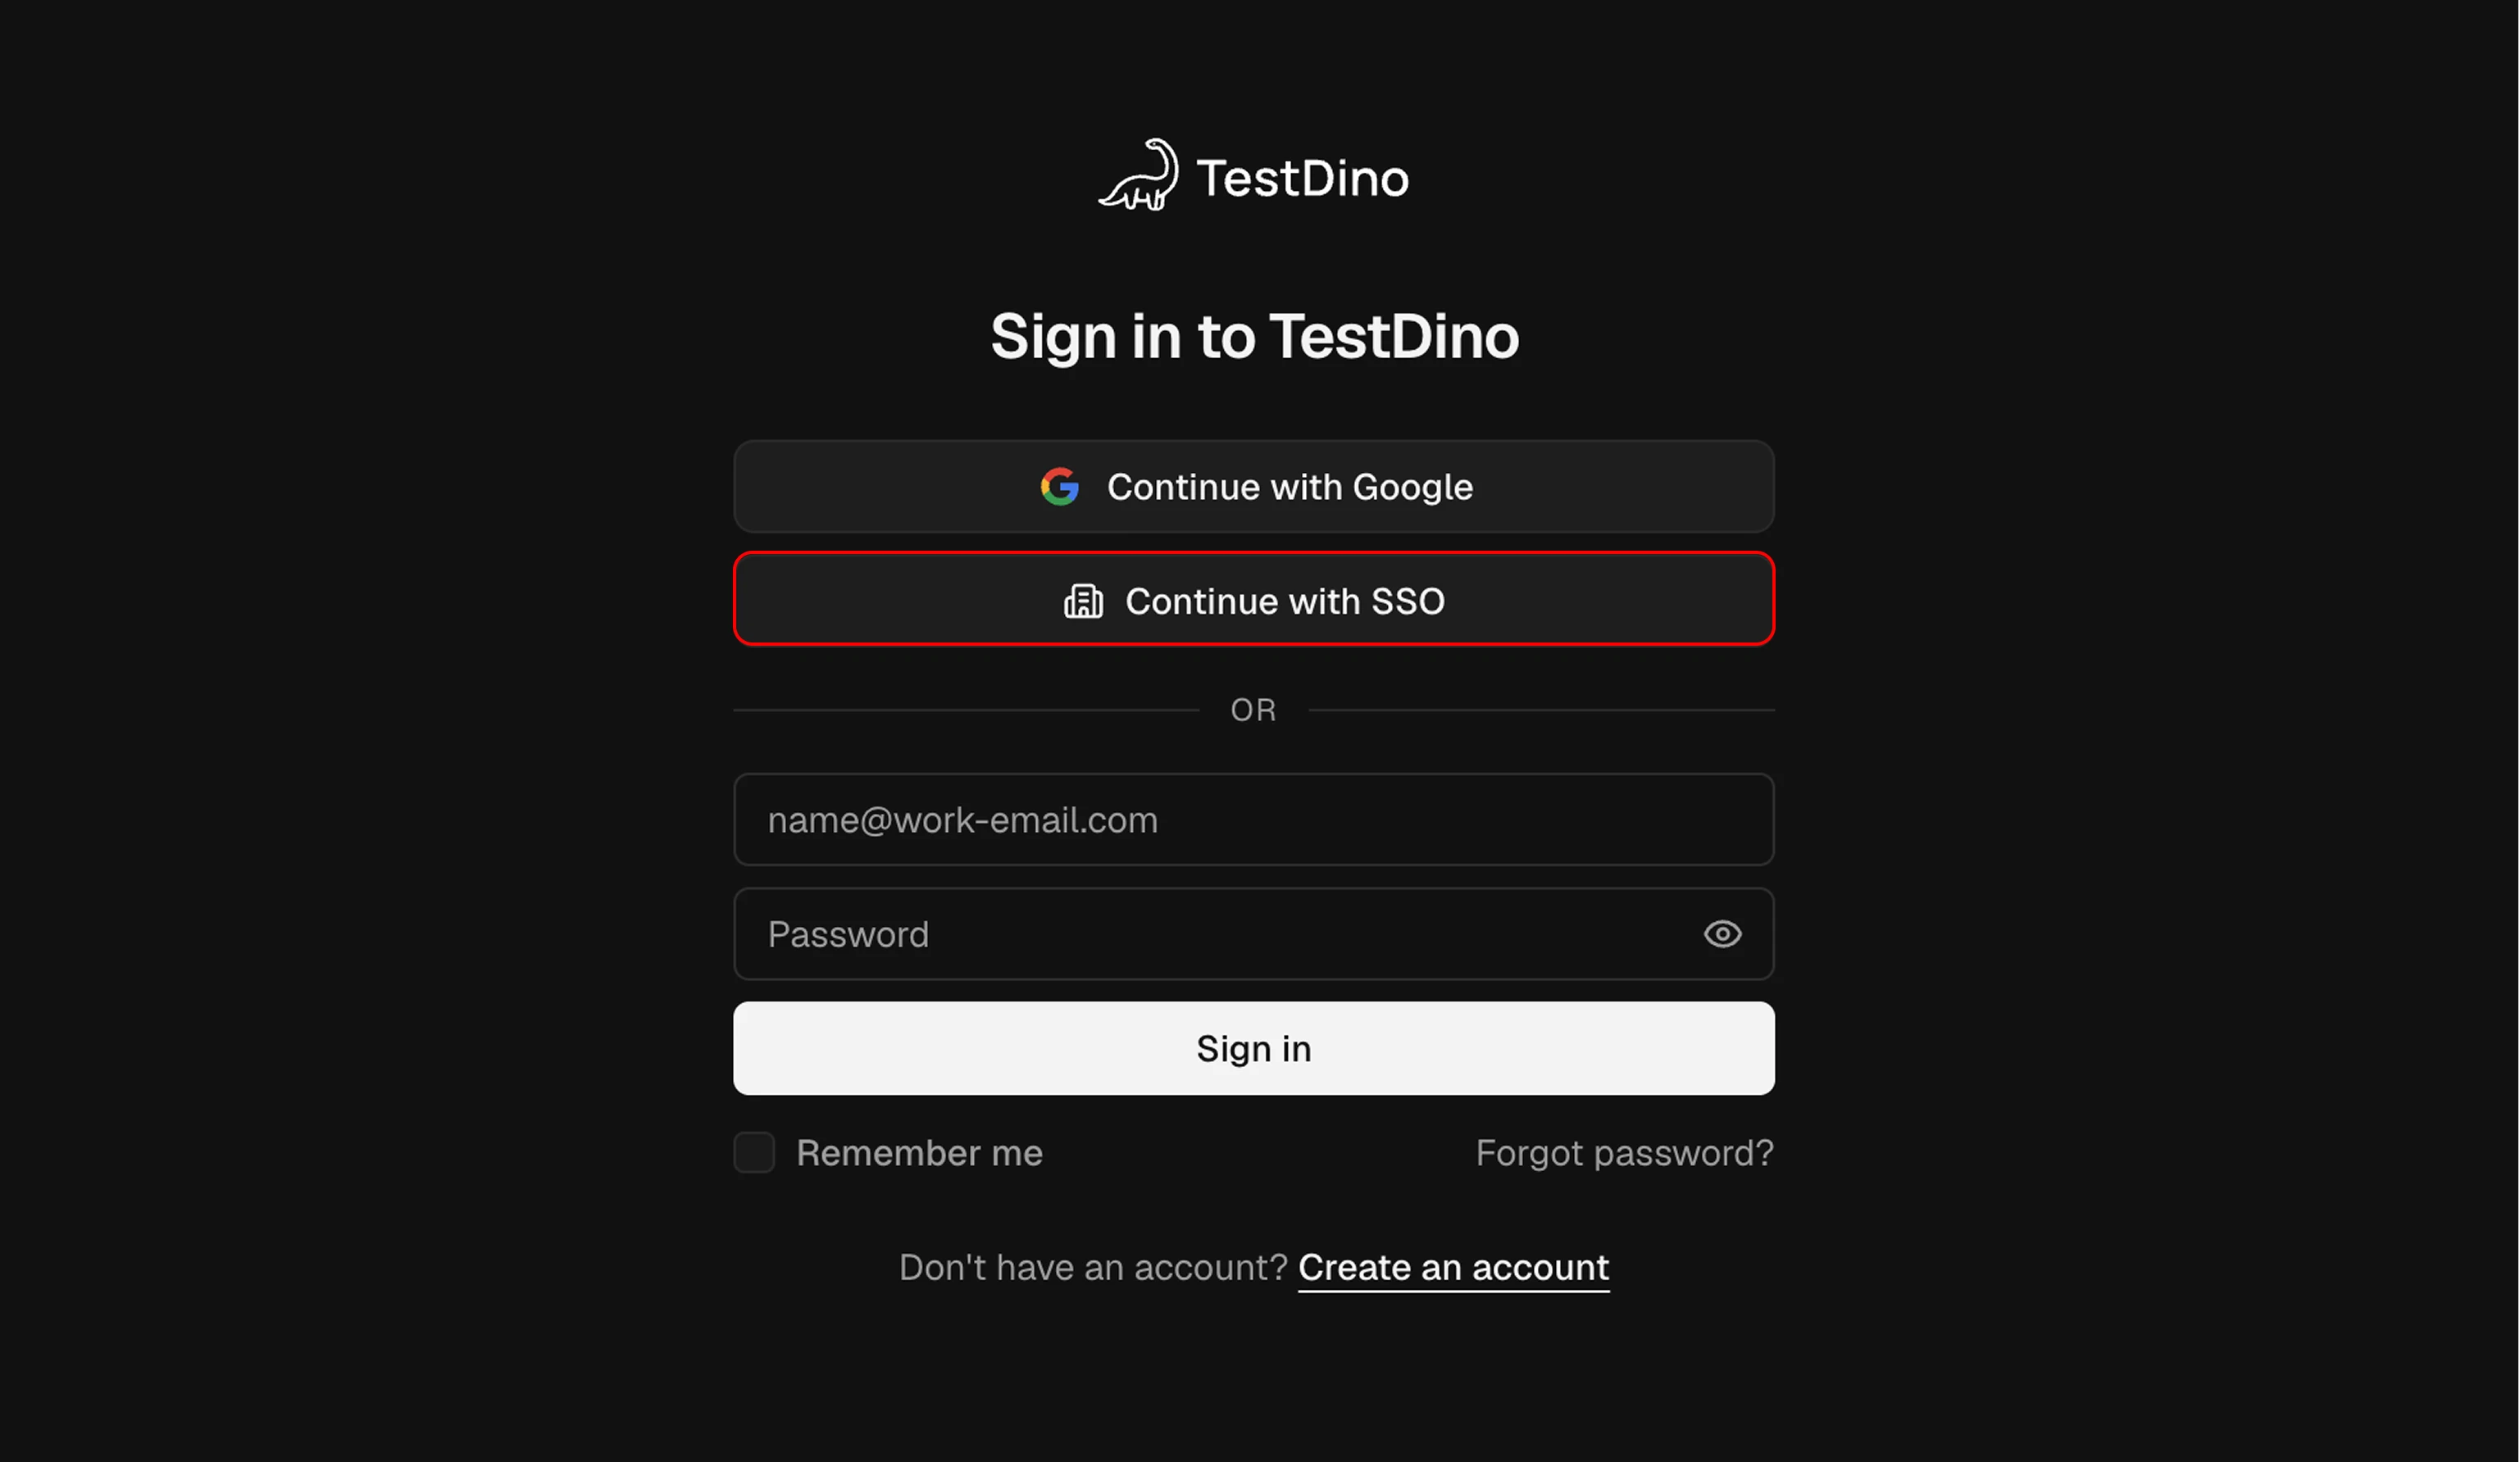
Once SSO is active, your team has 3 ways to sign in:- Email discovery at
https://app.testdino.com/auth/sso. The user enters their work email under Continue with SSO, and TestDino routes them to the matching organization’s IdP. Discovery works only for verified domains. The Continue with SSO button on the main login page (app.testdino.com/auth/login) opens this same page. - IdP app tile in your identity provider (IdP-initiated).
- Direct link to
https://user.testdino.com/api/v1/auth/sso/<your-org-key>/login, which skips email discovery and starts your org’s IdP login. This is the link to share while a domain is still Pending.
Day-2 operations
Once SSO is live, these are the routine tasks for keeping it running and rotating credentials.Troubleshooting
Most SSO failures trace to a mismatch between your IdP and the values saved in TestDino. Match your error message to the row below.Seat limits apply to new users only. A net-new SSO sign-in is blocked when the org is at its limit, but existing members signing in again are never blocked.
Related
Users, Roles & Permissions
Understand the roles a new SSO user can receive.
Organization Settings
Manage your organization profile and ownership.
Security & Compliance
Review how TestDino handles credentials and customer data.
SCIM Provisioning
Create and deactivate users automatically from your IdP.